Pflueger Nobby model No. 1963 service guide
This step-by-step illustrated procedure will guide you through the process of servicing the Pflueger Nobby model No. 1963 baitcasting reel. This medium‑ to heavy‑duty baitcasting reel is generally intended for freshwater casting and trolling, although it may be used for saltwater if rinsed and dried thoroughly after each field trip. Various models were in production from 1935 to 1971 and much of the information here can be applied to all the models.
The Pflueger Nobby overview provides more details on the various models, history, specifications, colors and finishes, and features of this reel. The overview also explains how to integrate this reel into a balanced tackle outfit for practical field use.
While this guide is specifically focused on the Pflueger Nobby, the larger purpose is to help you feel more confident of your ability to learn to fix things - especially fishing reels! You don’t have to know how to fix anything to start learning that you actually can. We're all beginners at some point.
As we work through this procedure together, you'll learn a lot of basic skills that can be easily transferred to other similar reels, and as you explore other parts of the library and media stack you can learn more about why these reels are so special and how they can connect good things from the past with the present, with a little help from us.
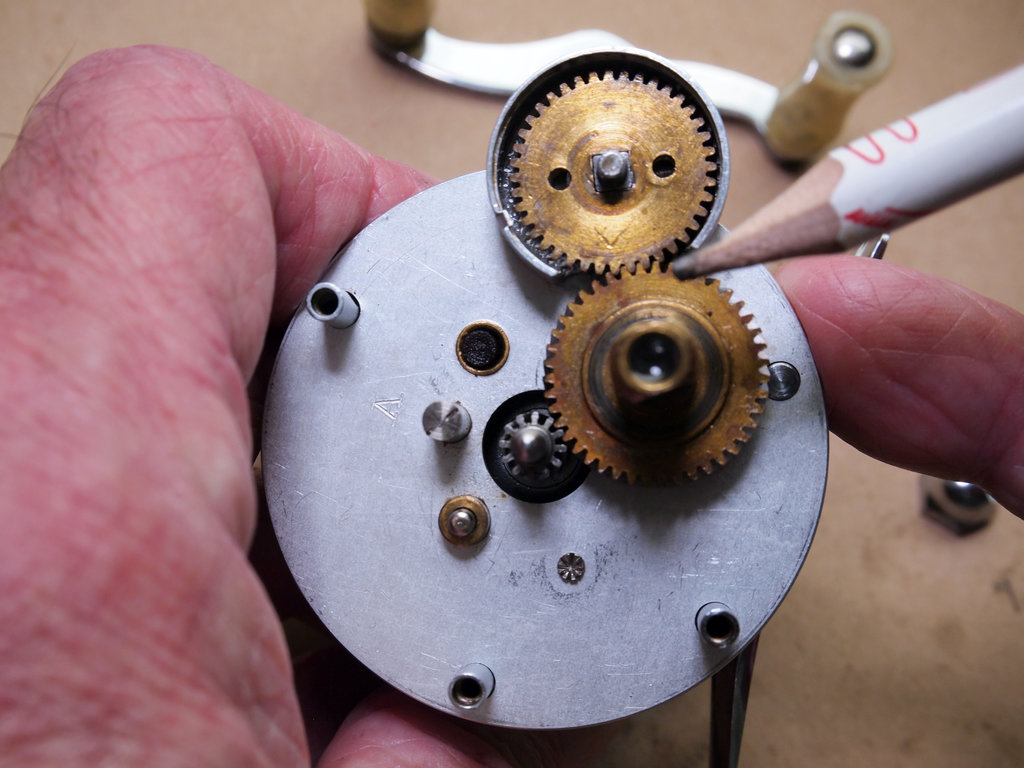
Table of contents
Use this TOC as a map for this guide. Click the link to go to that section.
Videos
Watching the YouTube videos first is a good way to get an overall feel for the reel and the service procedures.
Overview video: provides a quick look at this reel's features.
Watch the Pflueger Nobby model No. 1963 overview on YouTube:
![[alt text]](https://img.youtube.com/vi/ZDQlTf7cjkY/hqdefault.jpg)
Service videos: show you how to disassemble, clean, lubricate, and reassemble this reel.
Watch Cleaning and Lubrication for Vintage Reels on YouTube
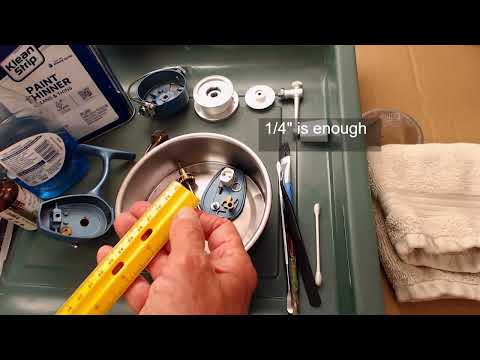
Watch Service Part 1 - Disassembly on YouTube
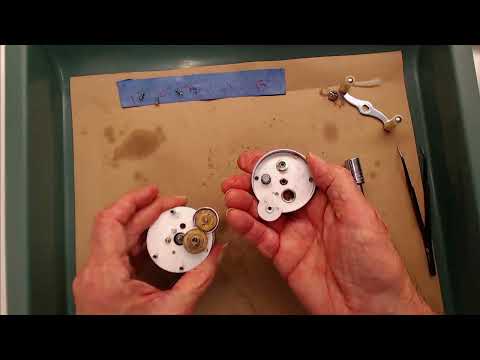
Watch Service Part 2 - Resassembly and Testing on YouTube
Before you begin
Complete an initial evaluation of the reel. All vintage reels should be evaluated and tested before starting any work on them to provide a baseline for later comparison.
If you just acquired the reel, remove the line from the spool. There is no way to determine the age or condition of the line on a newly acquired vintage reel, so it makes sense to start with new line as the final part of servicing a reel. This also allows you to inspect the arbor to determine what type of material it is made of (this will help date the reel) and clean it along with the rest of the parts.
Parts of a complete service
Since not all parts of a reel may need the same level of attention, servicing is divided into sections.
Disassembly and assessment: The housing must be disassembled to inspect the gears. If a reel has been well-maintained it may not need further disassembly. Simply lubricate the gears and other lubrication points and put the housing back together. If, however, the gears have accumulated old grease and contaminants like sand and salt, you will need to follow the entire disassembly procedure. While disassembling the reel you can note and assess any issues.
If the disassembly requires more than five to seven steps it will generally be divided into sections to make the procedure easier to follow and to provide some logical breaks.
Cleaning and lubricating: After disassembling the gears, all the parts, including the housing, should be cleaned and lubricated. Since this is generally the same for all vintage reels, a generic video and service page cover the basics. Special considerations for each reel are detailed in the service guide for each reel.
Reassembly and testing: As the reel is reassembled, various mini-tests can be performed along the way to catch any minor issues and avoid having to take the reel completely apart again. After the reel is completely reassembled there are several bench tests that should be performed to make sure it is ready for field use.
Typical issues
Vintage reels tend to accumulate old, hardened grease, possibly mixed with sand and grit. Hardened grease and grit tend to immobilize internal parts that need to move freely - like the gears and pinons - and may prevent them from meshing correctly. The reel may not crank easily and smoothly if it has not been serviced (or not serviced correctly) for a long time.
Clicker: Hardened grease and grit can prevent the clicker from engaging. If you turn the handle, try the clicker button in both positions, and don't hear a click, hardened grease is a likely suspect. Simple servicing the reel will often fix many issues like this without needing to repair or replace any parts.
Shaft and level wind: On the Nobby, like many baitcasting reels, the shaft is a more exposed part. Since it is more exposed to the elements it is more likely to have grit and / or hardened grease in the grooves, which will prevent the pawl and guide block from traveling back and forth correctly, so the crank will not turn smoothly and the level wind will not work properly. Again, a thorough cleaning and lubrication will often correct this without having to replace any parts to perform additional repairs.
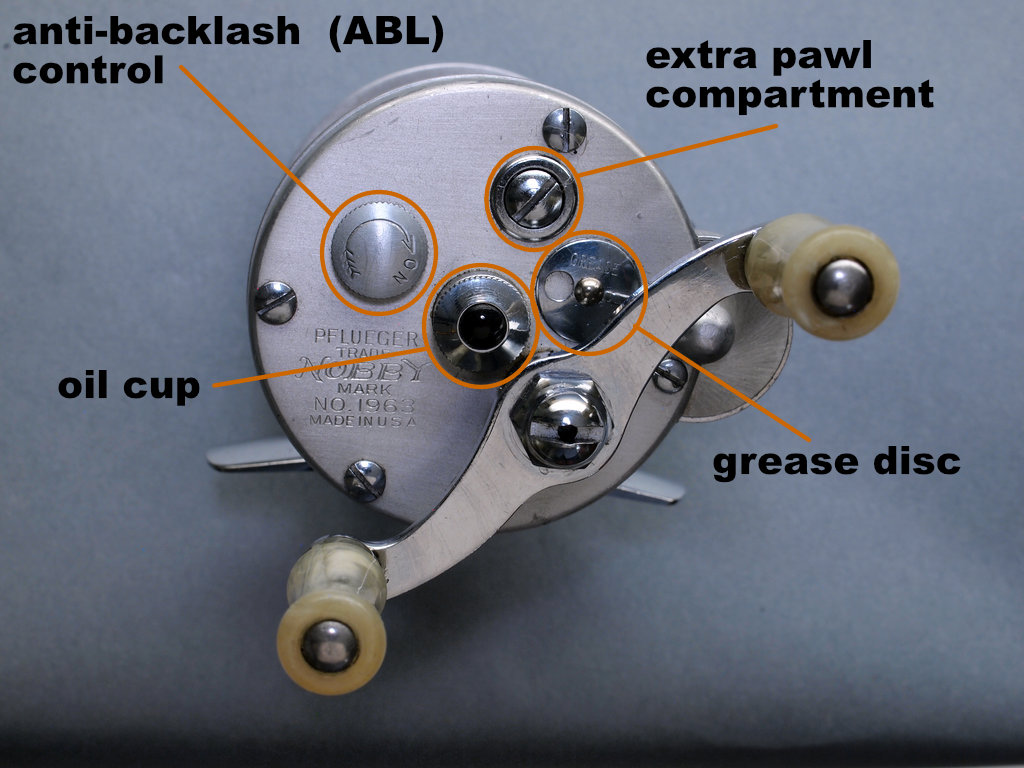
Pawl: The pawl (a very small part) may be damaged if grit has been allowed to accumulate on the shaft and the reel has been used anyway, without cleaning and lubricating. When the pawl is removed from the guide block you can inspect it and, if it is damaged, it will need to be replaced. Fortunately Pflueger included an extra pawl in a small compartment in the cap, and you may be able to use this spare to replace a damaged pawl.
If the spare is not in the compartment - it's been used by some long-ago fisherman to do a field repair, or just lost in the sand somewhere - you will need to attempt to locate a replacement. The level wind will not work without this small, critical part. You will generally need to locate a "parts" reel on an online auction site or thrift store so that you can salvage replacement parts from that.
Difficulty and time estimate
Easy - 1 hour
Difficulty: For an experienced DIY person this is an easy procedure. Even for beginners, this is a good reel to start on as it is very simple and designed to be easily serviced in the field. There are a few challenges, but these are covered in the following procedures so anyone should be able to follow along.
Viewing the companion videos will help get an overall feel for the procedure, then you can follow the step-by-step procedure at the workbench.
Estimated service time: Excluding soak times for cleaning parts or dealing with stuck hardware, the actual procedure should take about 1 hour.
Servicing does not all have to be done all at one go. A good strategy is to disassemble, make notes of any issues, soak the parts overnight, then the next day clean, dry, lubricate, and reassemble and test.
If you are a complete beginner it's a good idea to proceed at a leisurely pace. More experience will result in a considerably shorter timeframe.
Again, this is a very simple baitcasting reel to service, so it is a good choice for a first project, but don't let this make it seem insignificant. It does require some dexterity and patience, and acquiring a "feel" for working on vintage reels. At the same time it helps you build those skills.
Disassembly I
Goal: remove outer parts of the reel so you can access the gears and other inner parts.
All directions assume you are looking at the front of the reel, with the reel upright - foot down - as it would be mounted on a casting rod.
Take a picture prior to each step so later you will know how parts were oriented, etc. Keep a legal pad and pencil handy to make notes and draw diagrams.
-
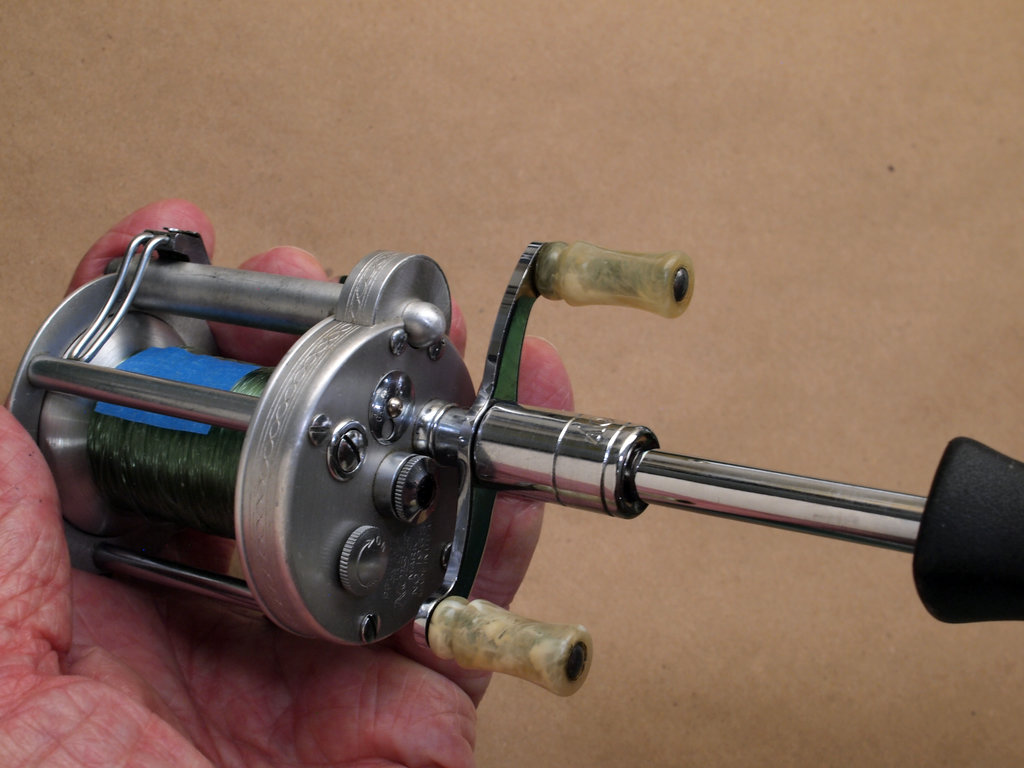
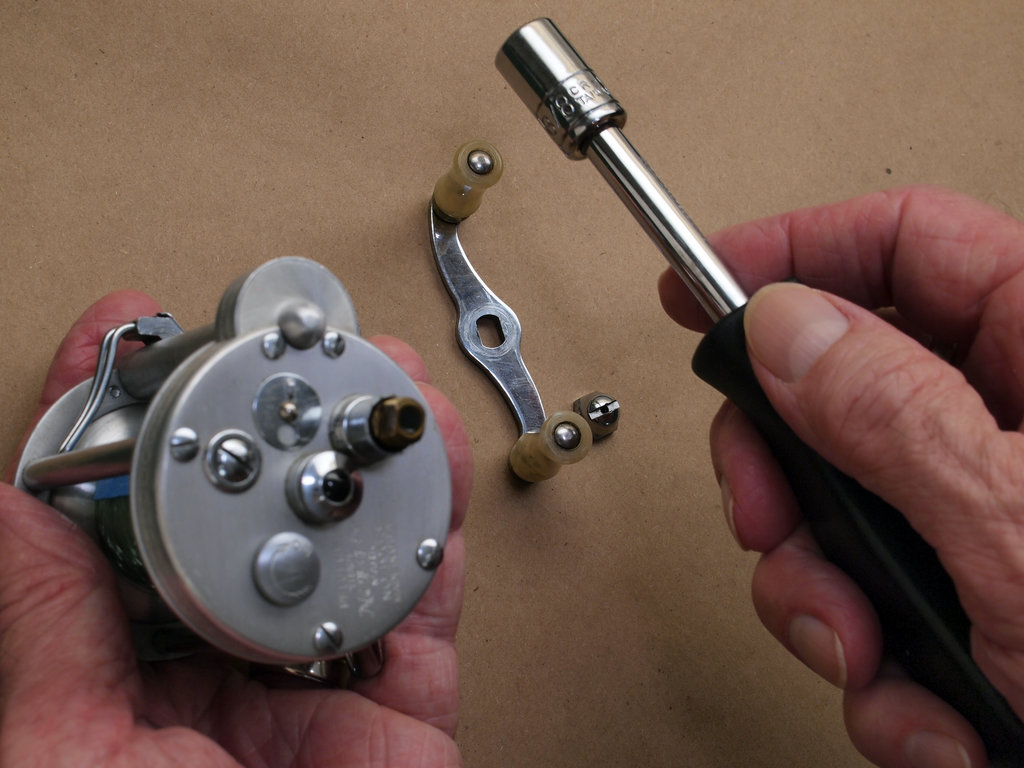
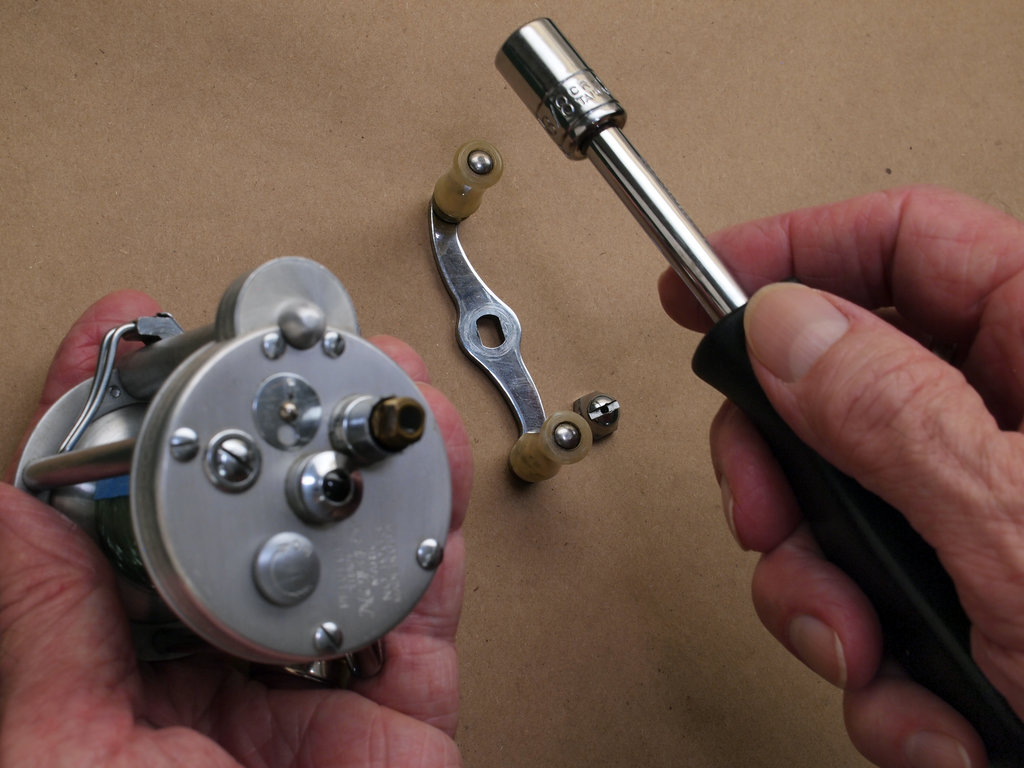
Remove the crank nut and crank / handles.
Use a 3/8" socket wrench. A screwdriver can also be used but the socket has the virtue of being less likely to damage the nut, especially if it is hard to turn.
Removing the crank / handles -
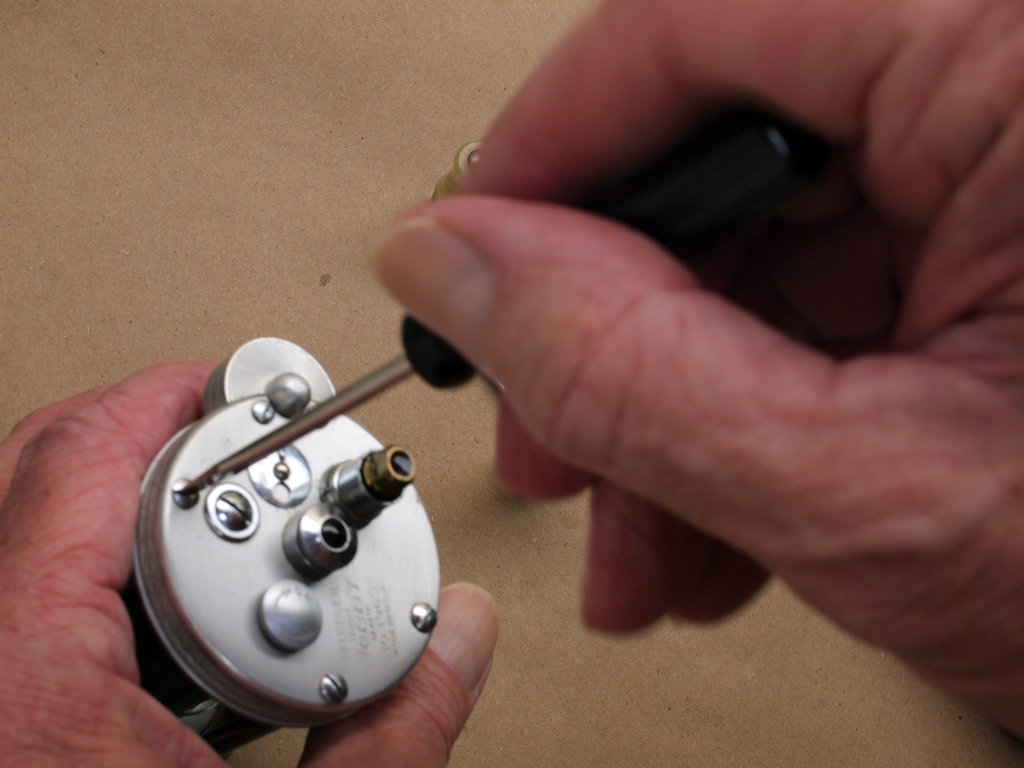
Remove the cap screws (3).
A flat-blade 3.5 cm screwdriver will probably be the best fit.
Note! These are small parts. Make sure to keep them in a container on the workbench or in the tray. You can also take a strip of tape, fold the ends over so it will stick to the work surface (sticky side up) and stick the screws to that - this also allows you to number them for easy reference when you reassemble. Blue painter's tape is excellent for this use because it does not leave a sticky residue on parts and has just enough grip to keep them from rolling away.
Note which screws came from which holes in the cap - in vintage reels it is important when re-assembling to put the screws in the same holes as they were in originally. Slight differences in the screw and hole threads can develop over the course of time.
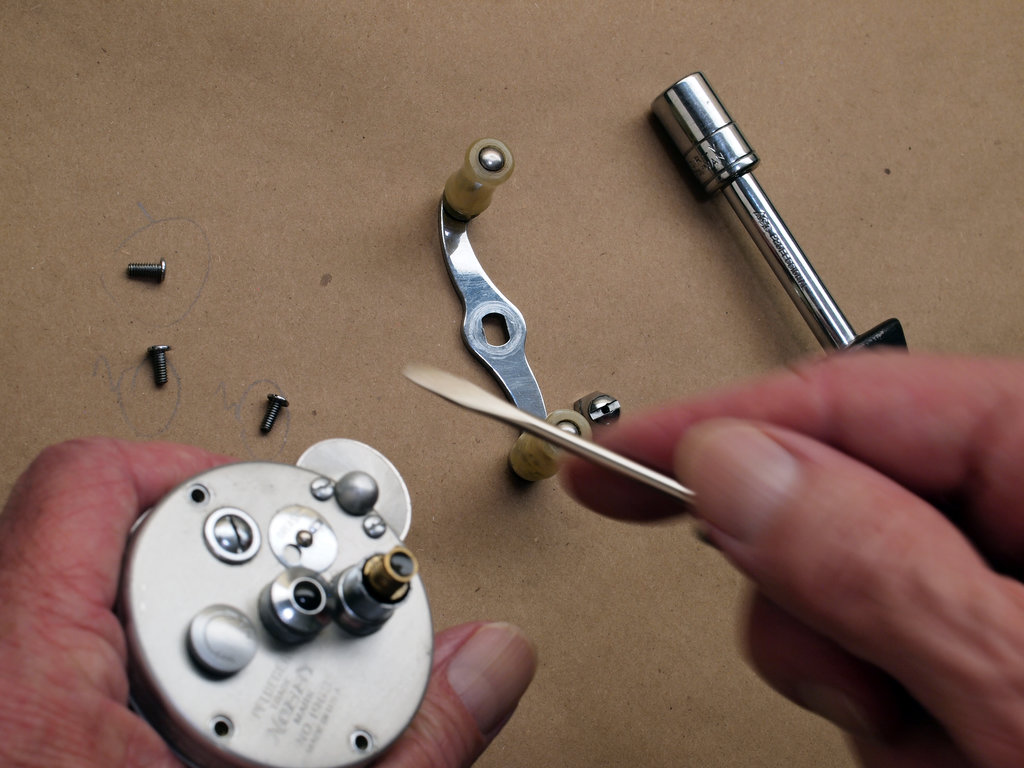
Removing the cap screws -
Loosen (do not remove) the guide block cover screw.
If you accidentally turn this very small screw too far (easy to do), it is not a problem. Just make sure if you want to leave it off for now, be sure to keep track of the very small guide block cover along with the screw. Otherwise you can just put it back in loosely to keep them both together.
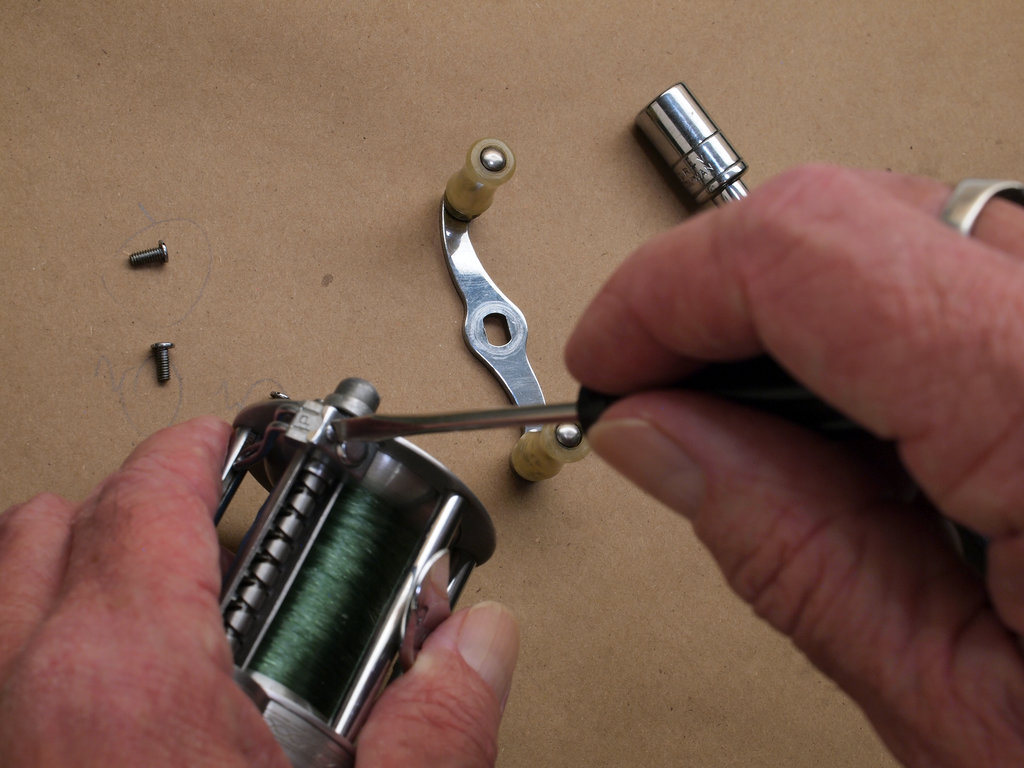
Loosening the guide block cover screw -
Turn the cover and remove the pawl.
This is a very small part! Make sure to keep it in a container on the workbench or in the tray.
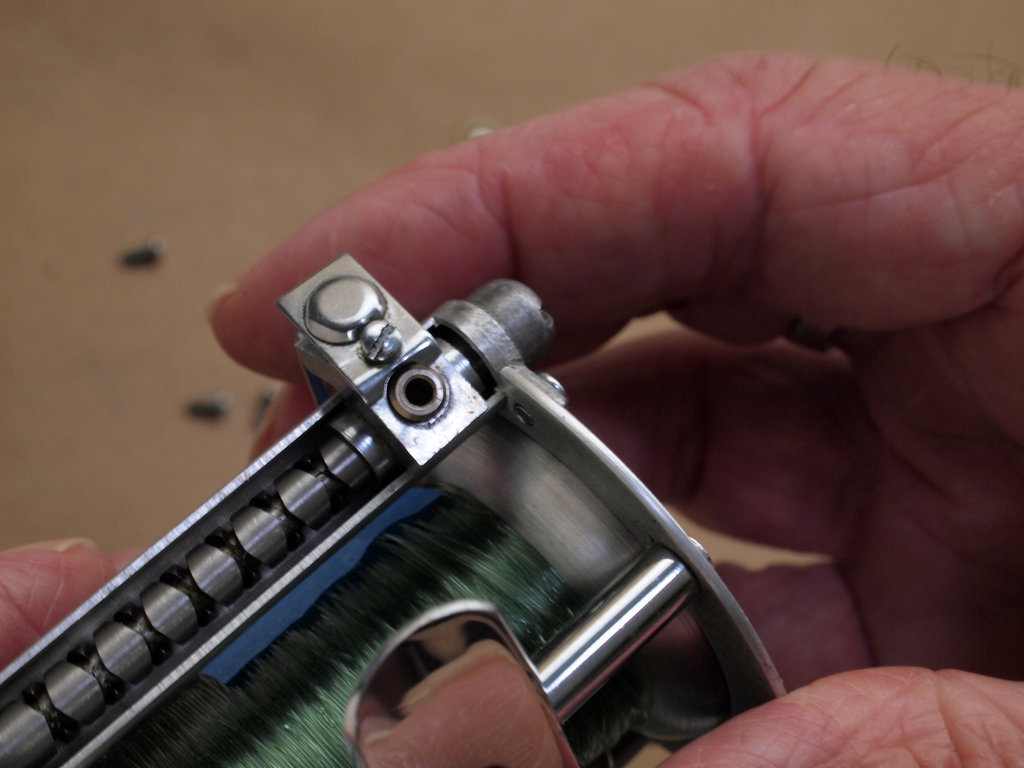
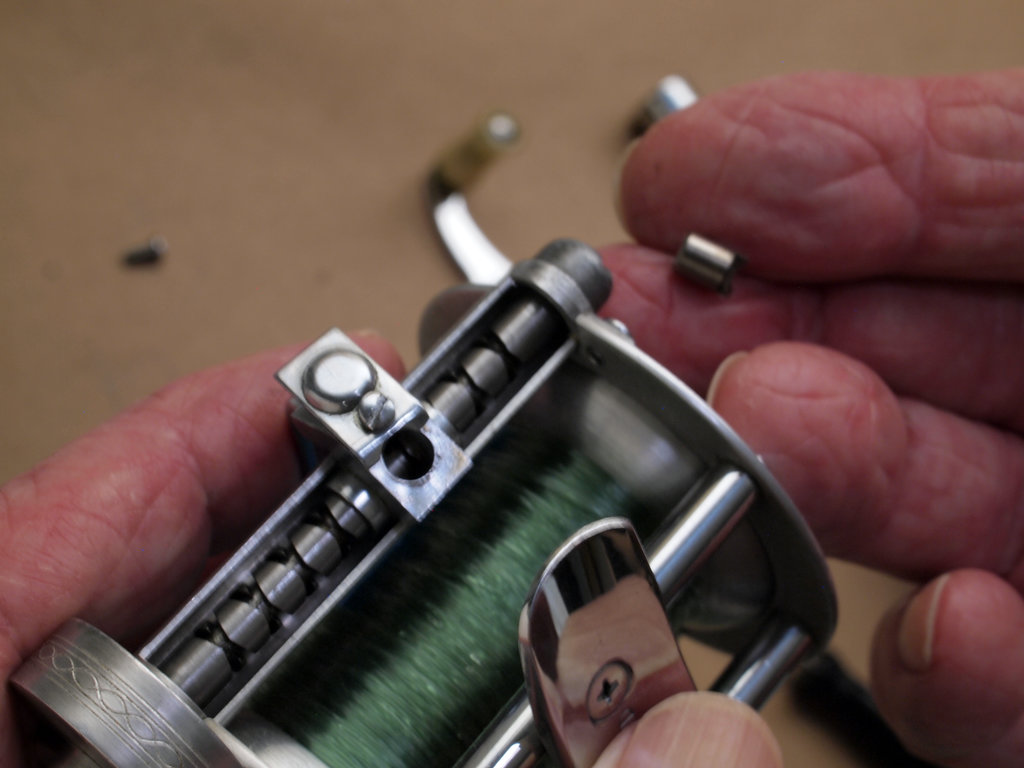
Removing the pawl -
Remove the cap.
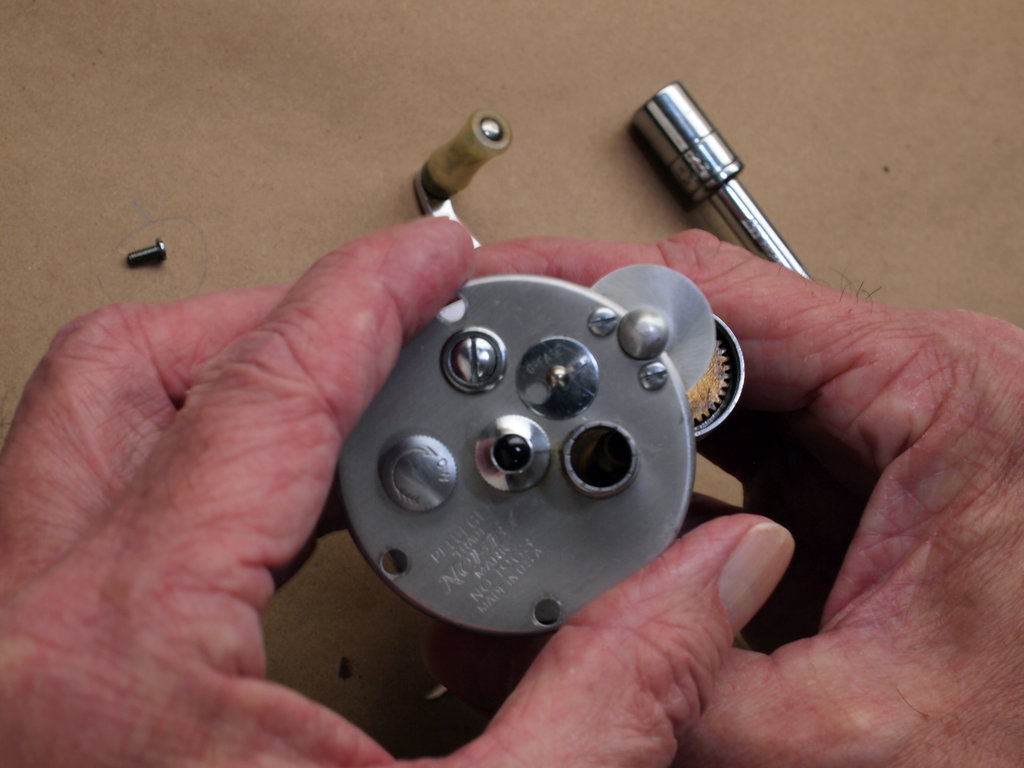
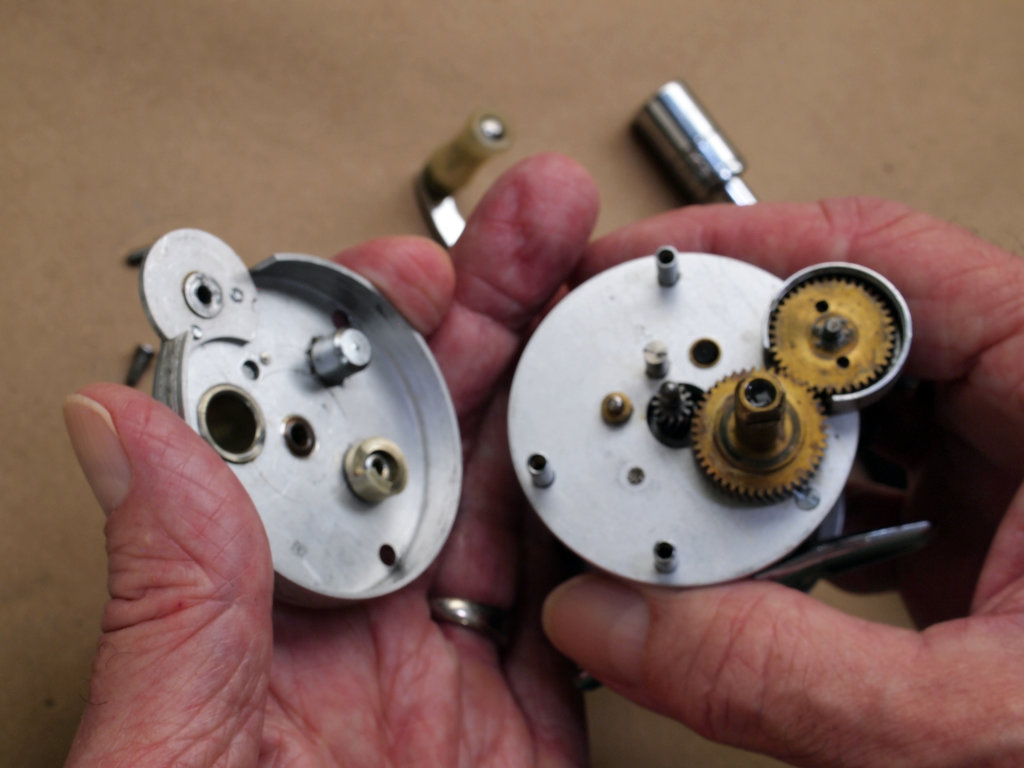
Removing the cap
Disassembly II
Goal: remove gears and other interior parts so you can clean and lubricate them.
-
Remove the gear.
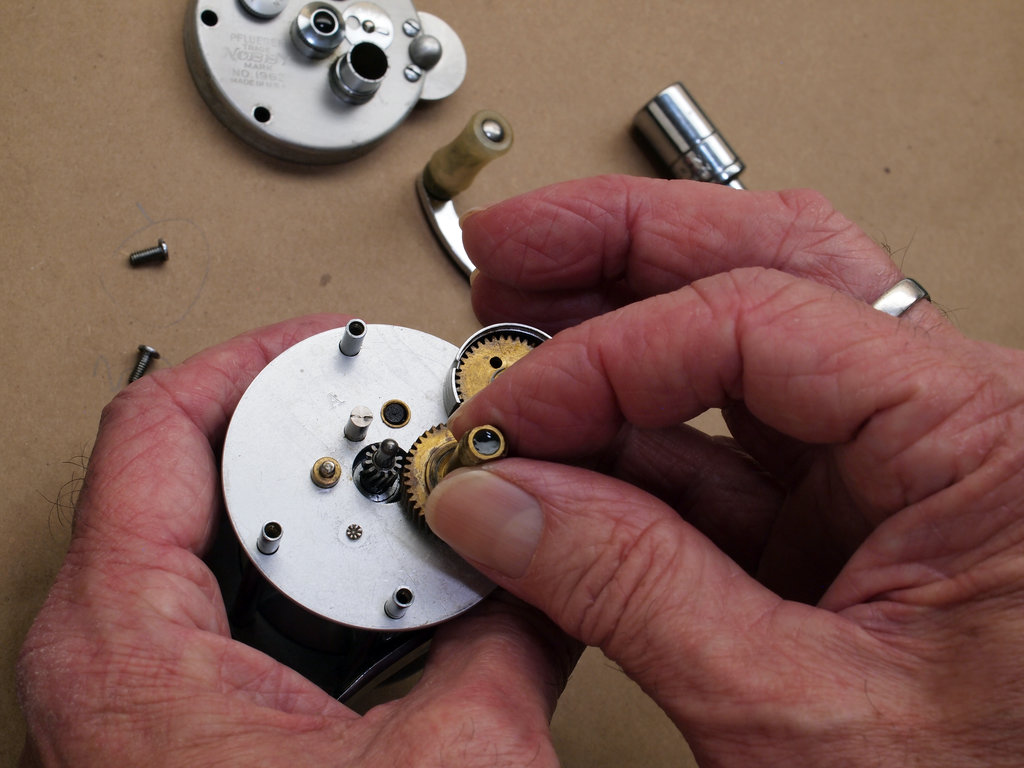
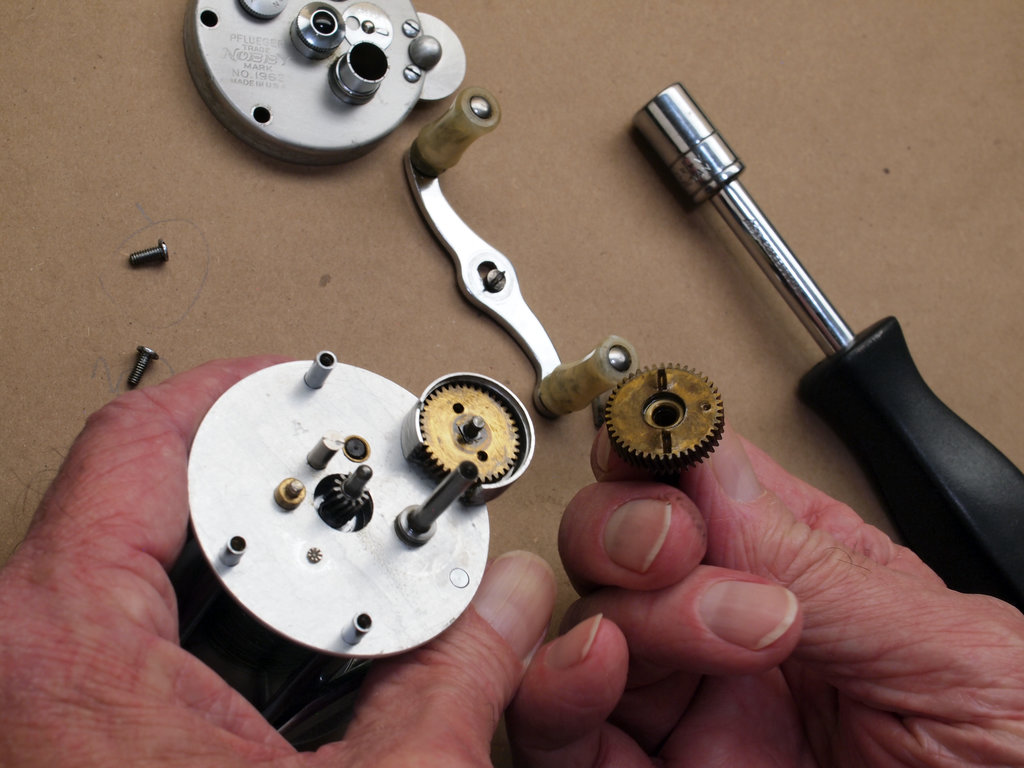
Removing the gear -
Remove the spool pinion.
Small part!
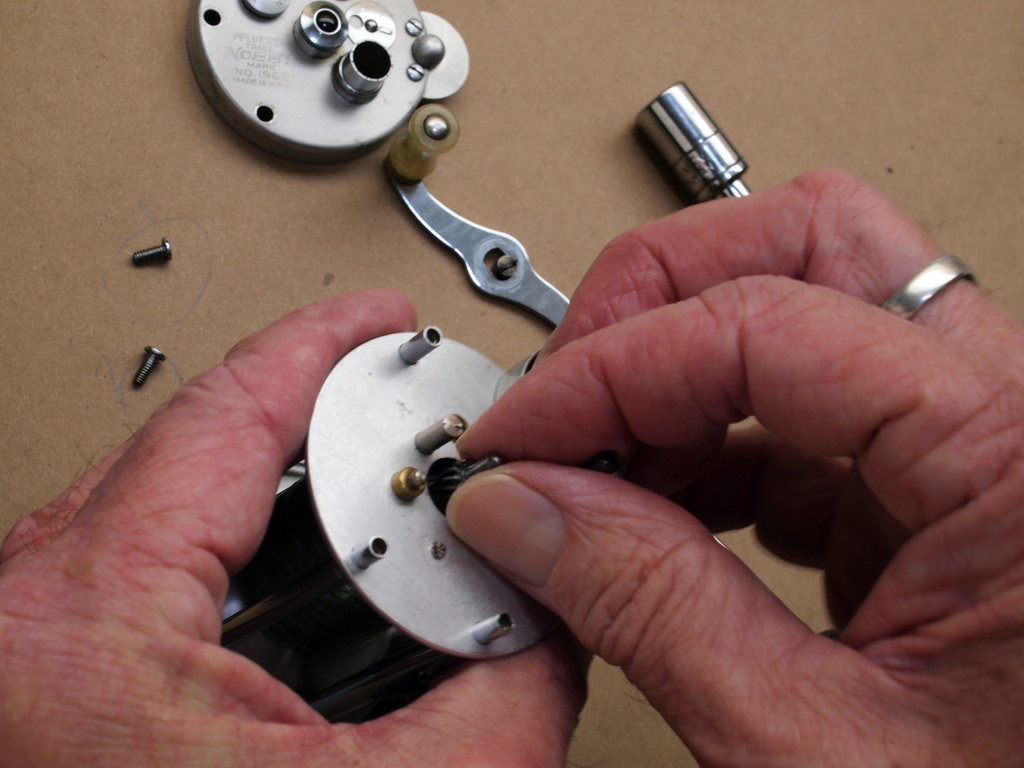
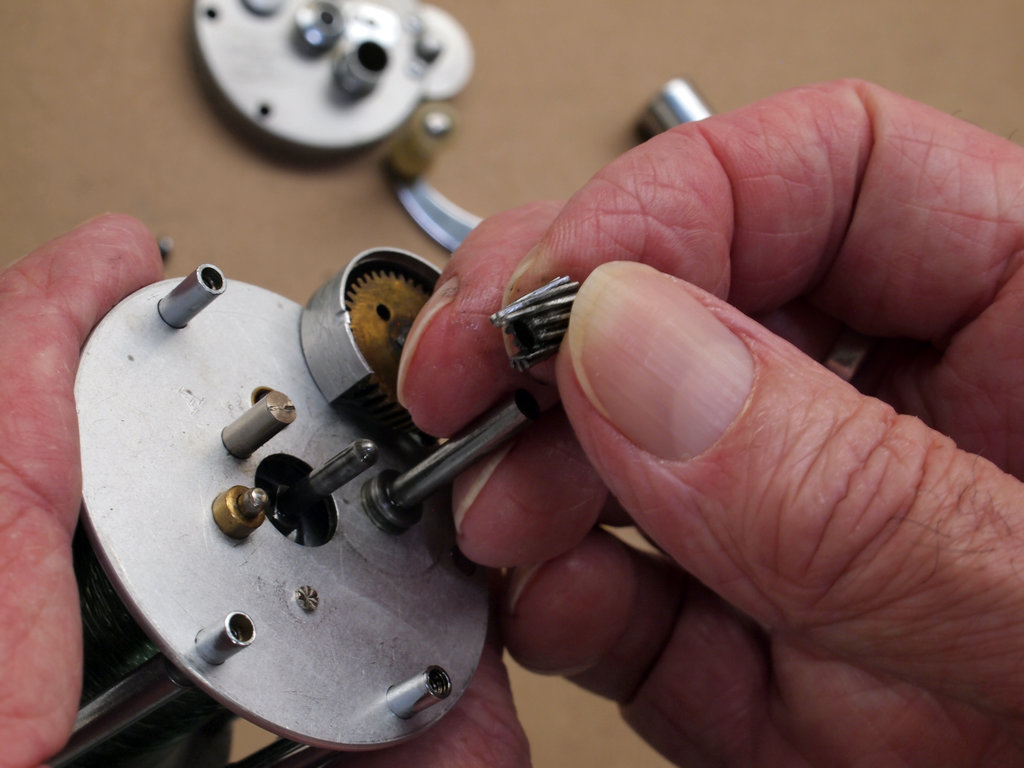
Removing the spool pinion -
Remove the shaft pinion.
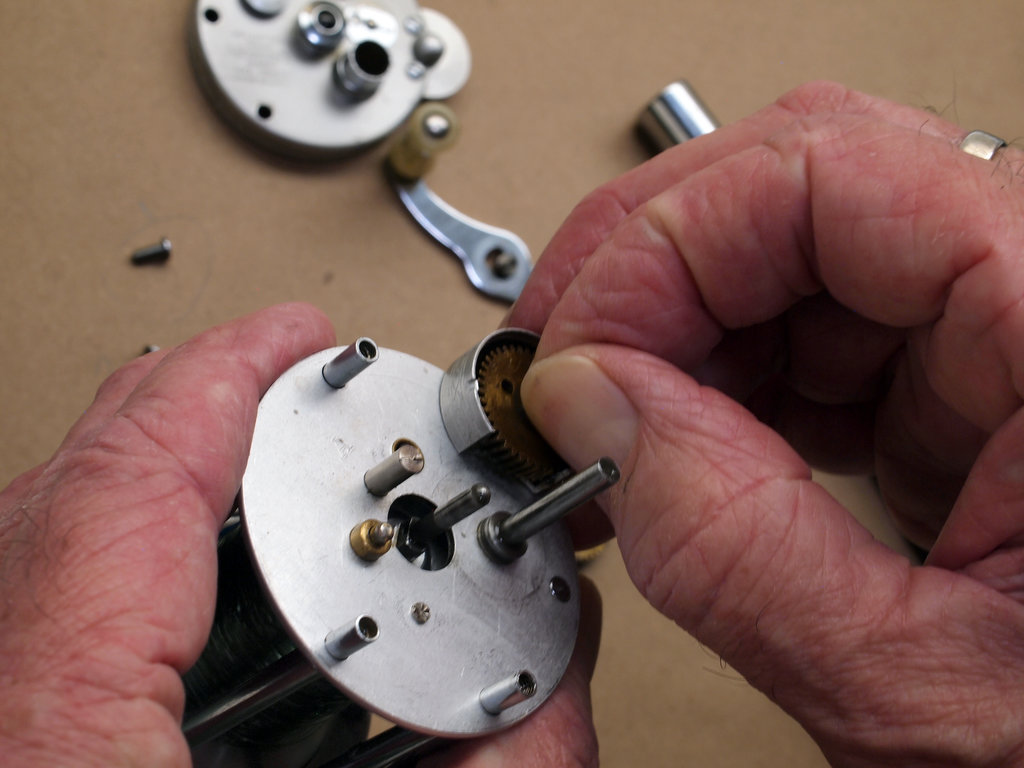
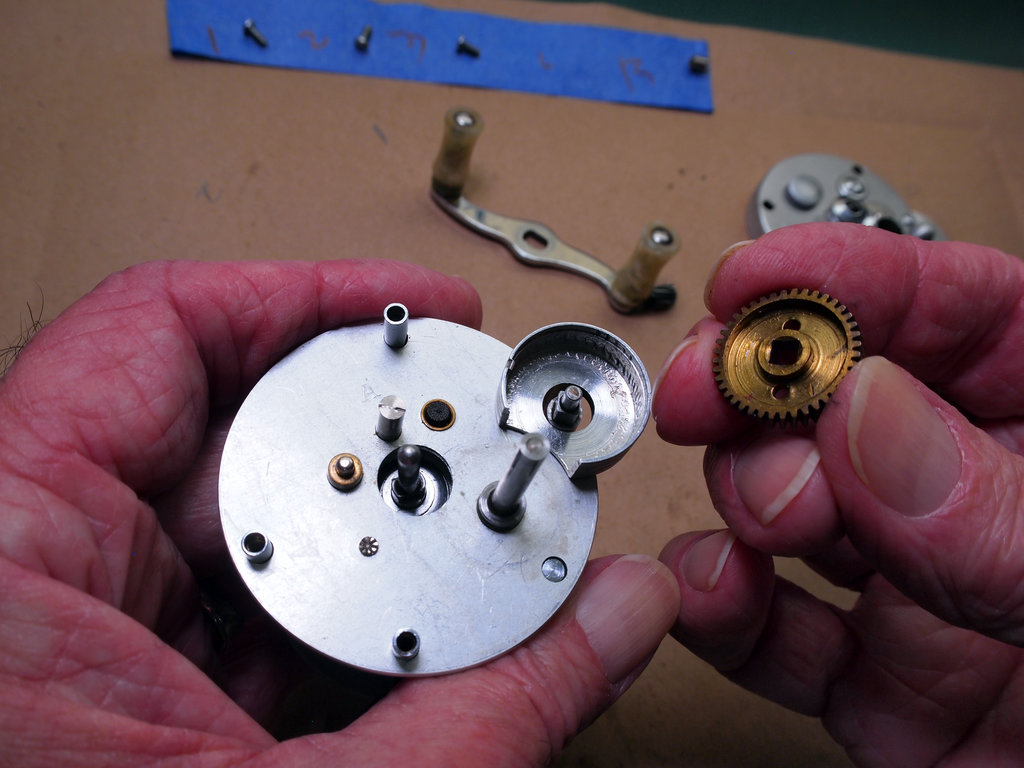
Removing the shaft pinion -
Remove the shaft.
The line guide + block assembly comes loose when the shaft is removed. Set that aside as well.
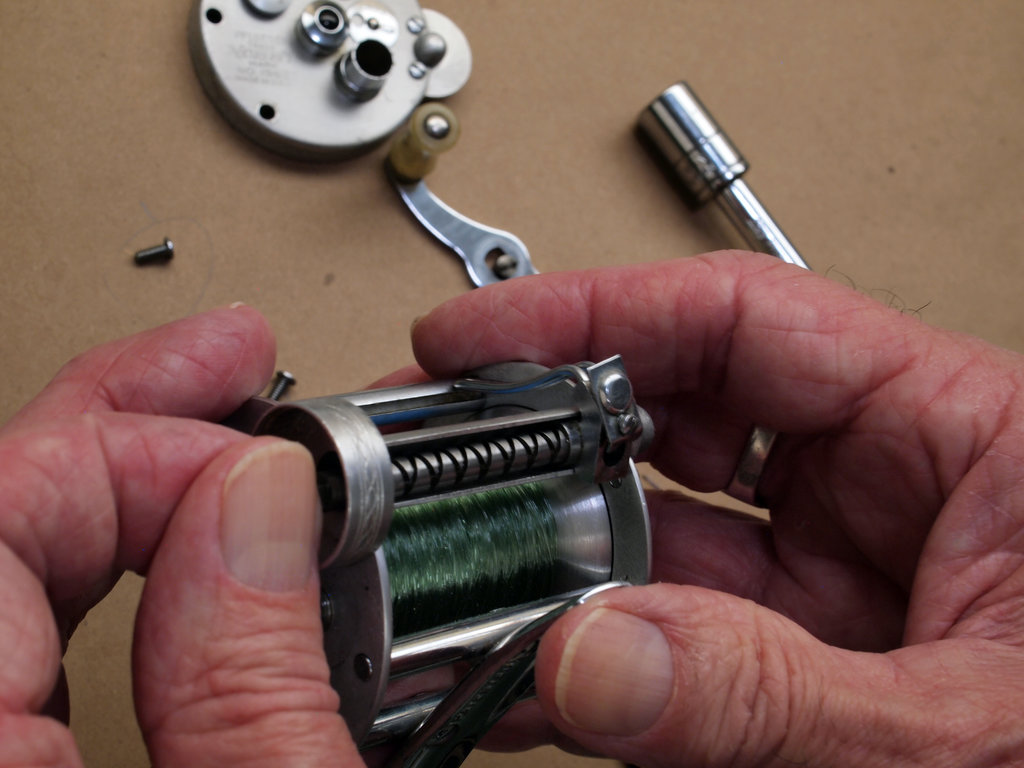
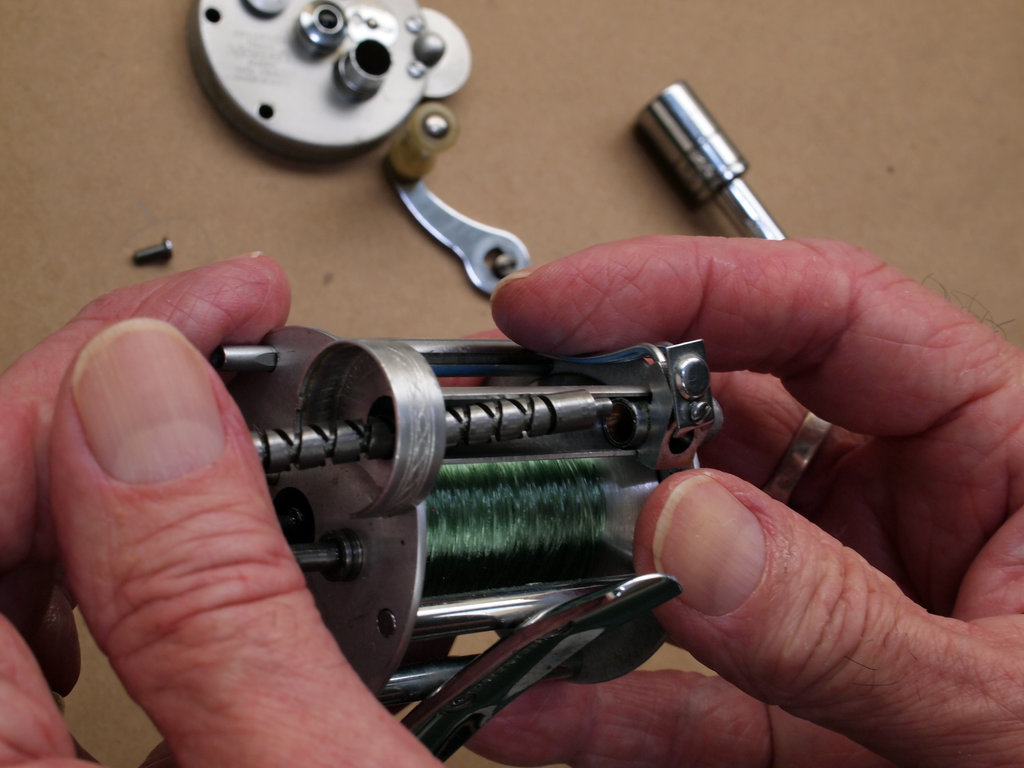
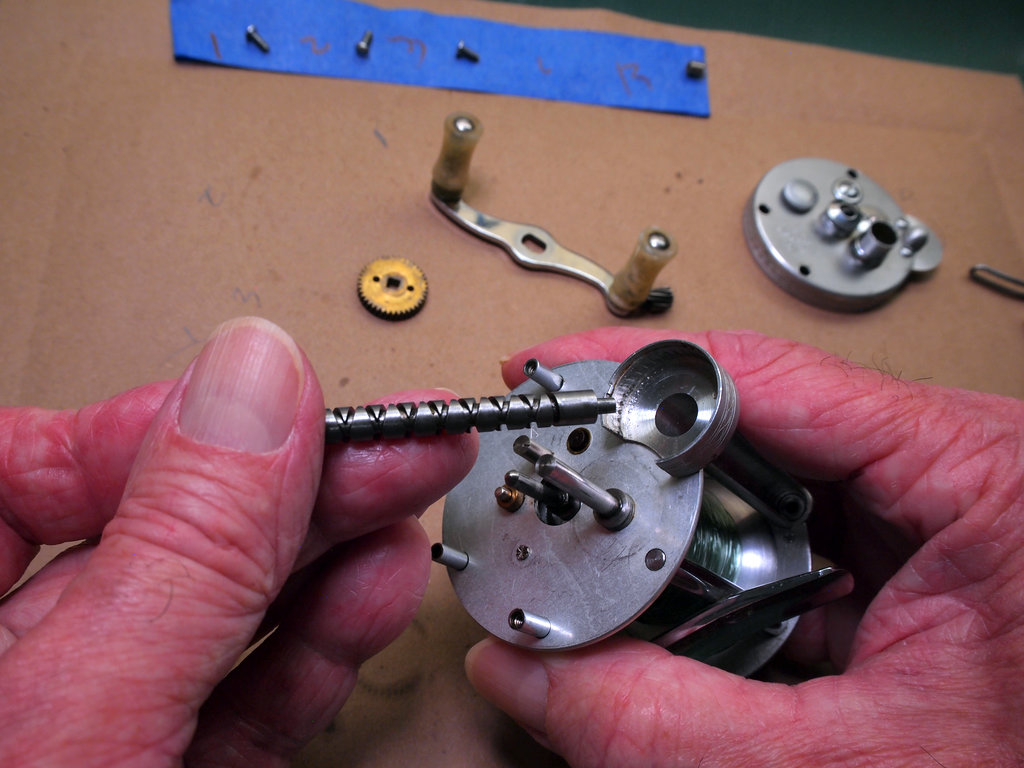
Removing the shaft -
Remove the housing screws (2).
Leave the large shaft screw in place.
Small parts! Note which screws came from which holes.
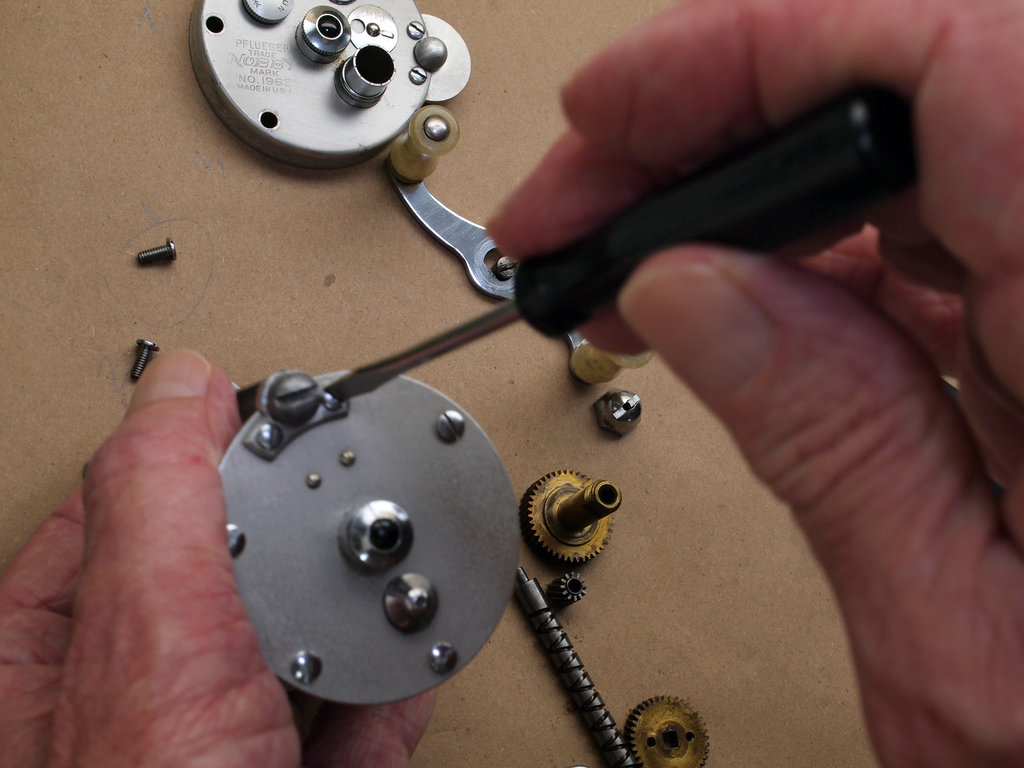
Removing the housing screws -
Remove the shaft housing.
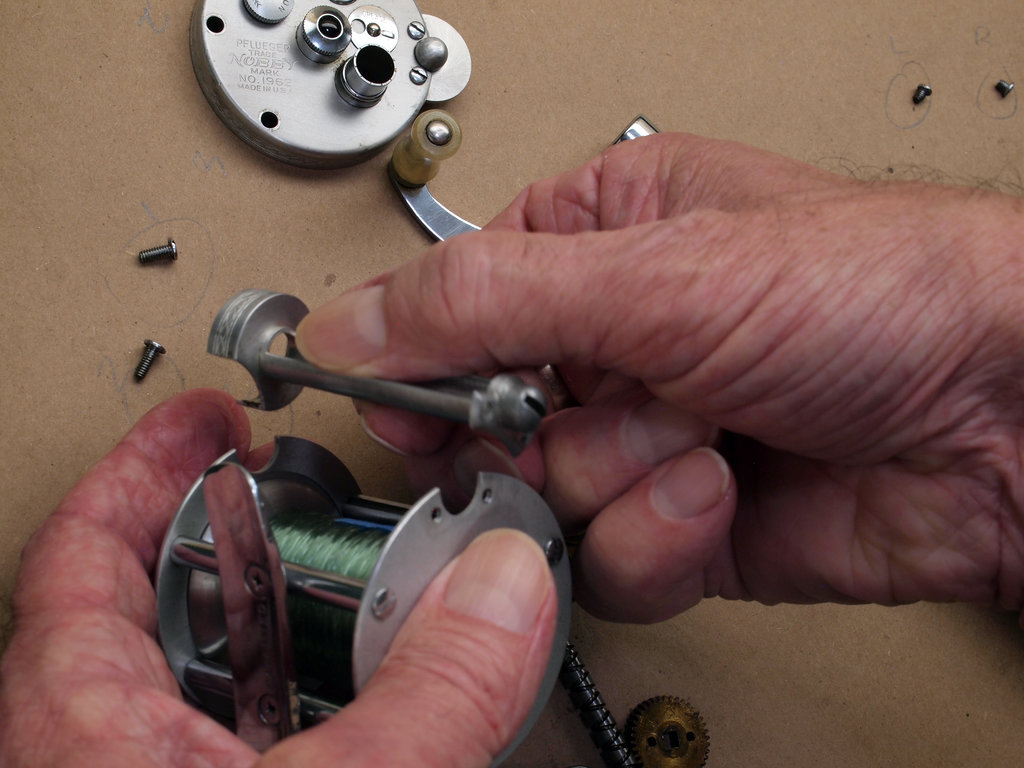
Removing the shaft housing -
Remove the front plate.
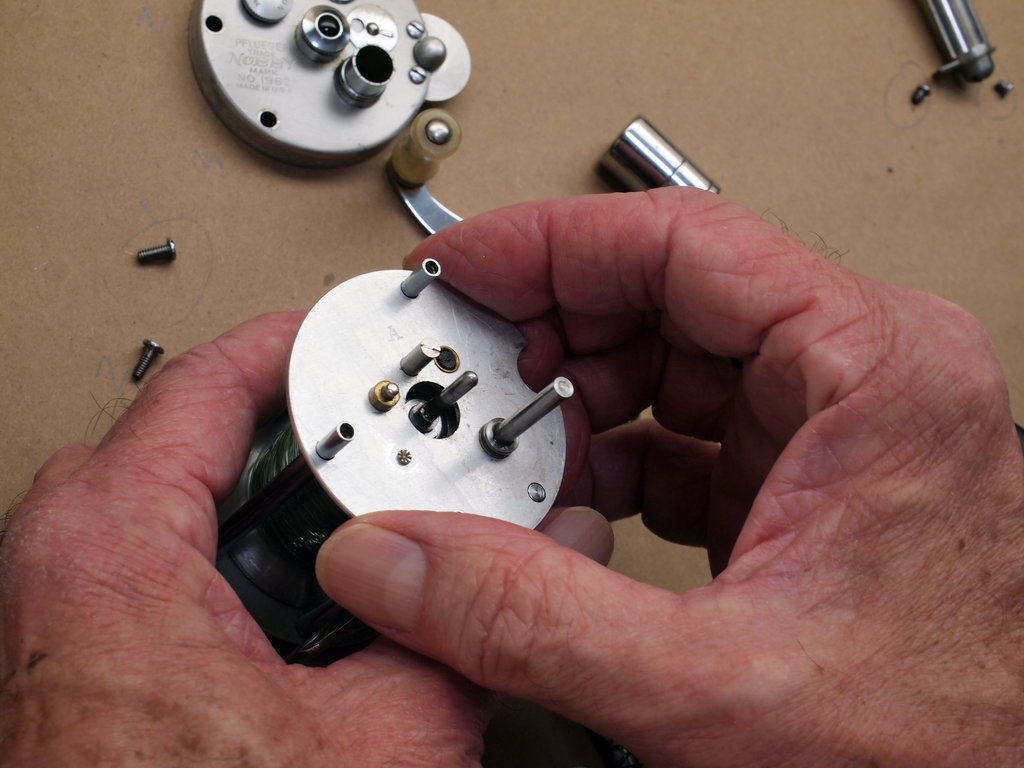
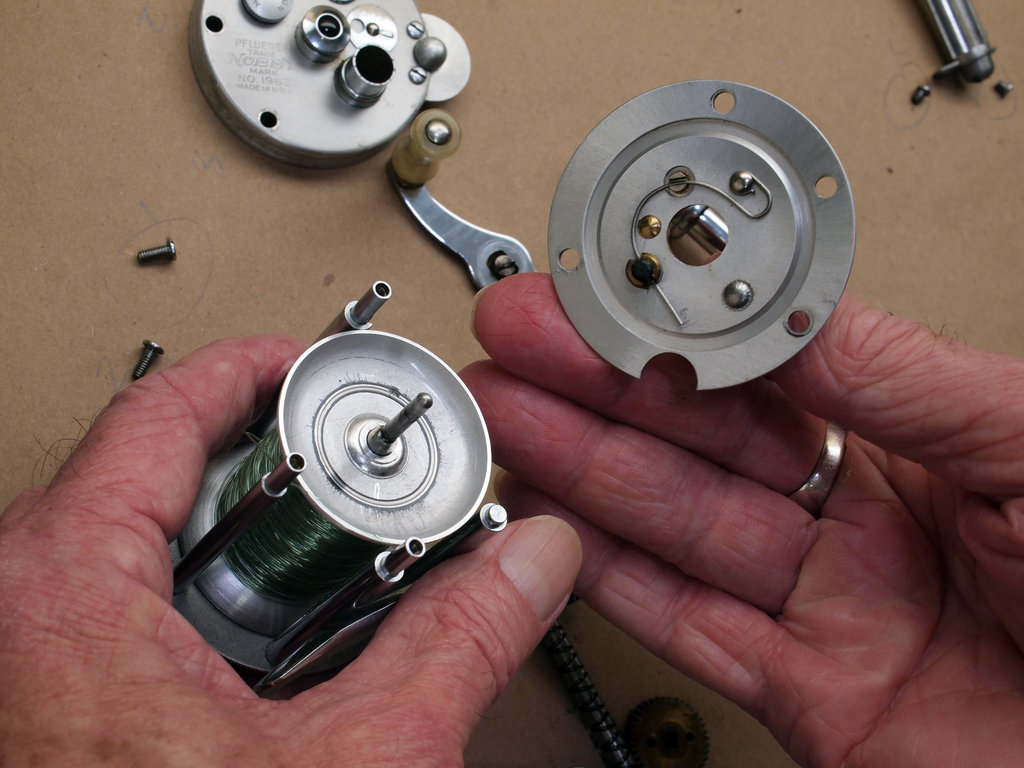
Removing the front plate -
Remove the spool.
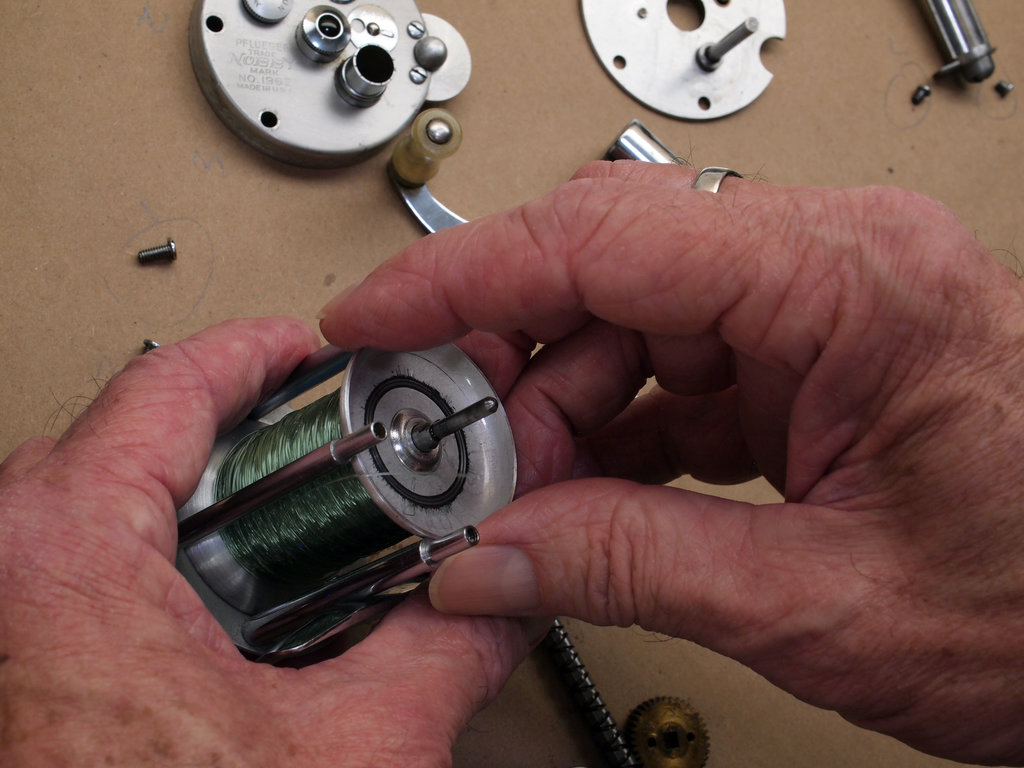
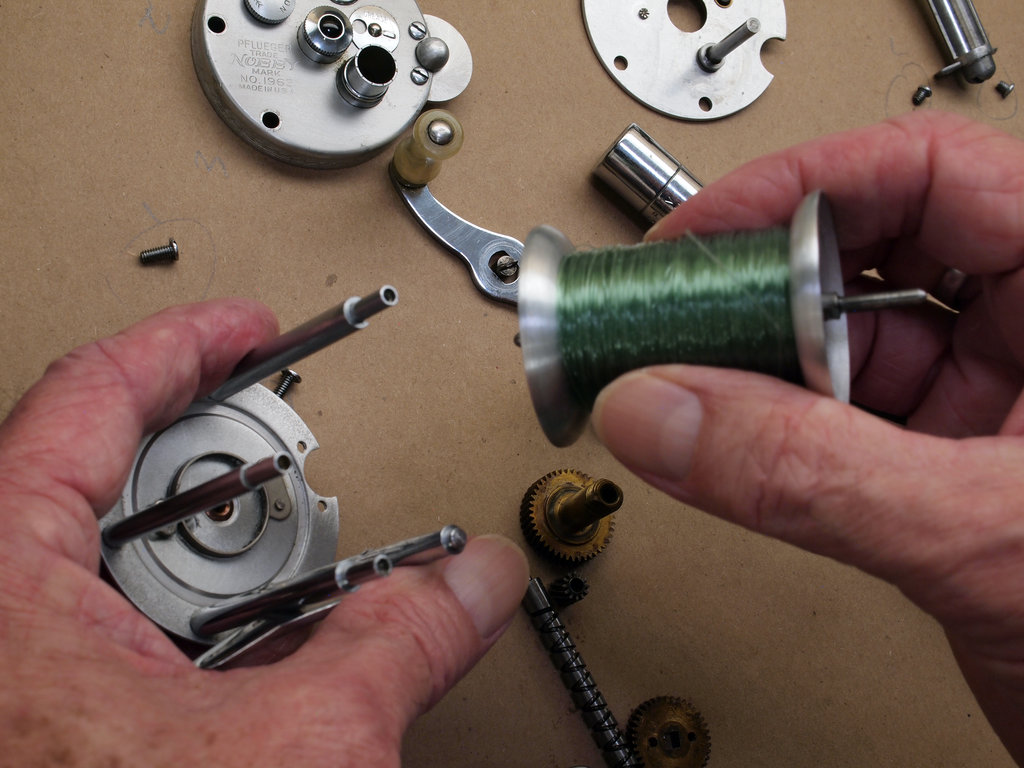
Removing the spool
The reel is now fully disassembled and you are now ready to clean and lubricate the gears and housing.
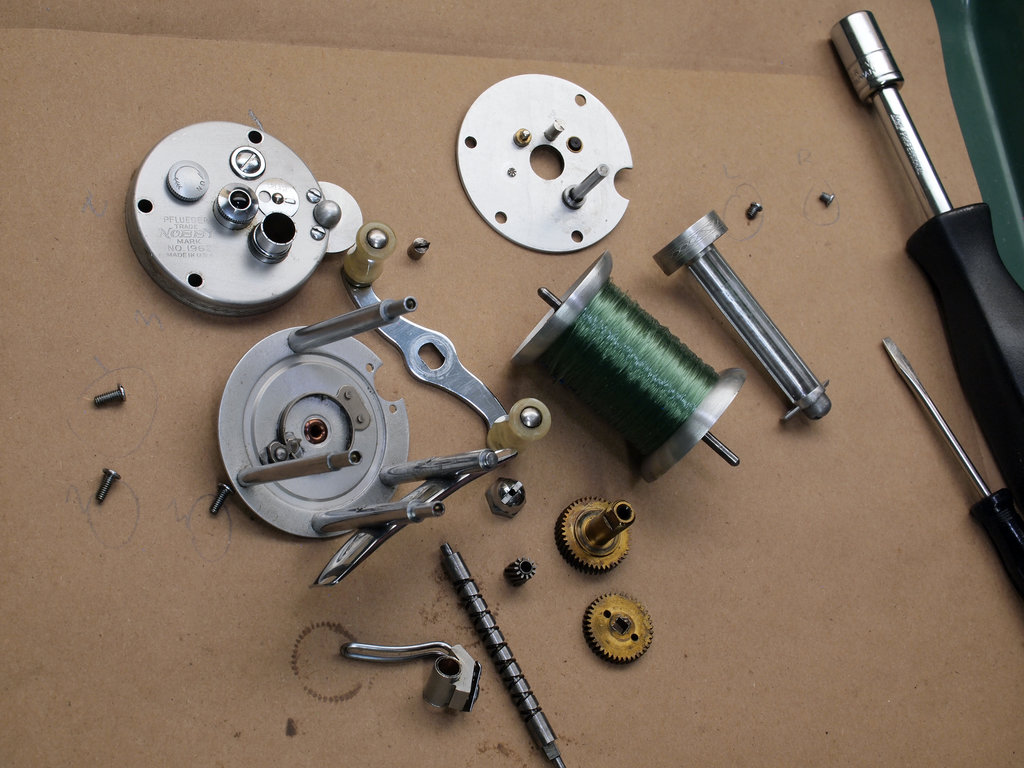
Cleaning and lubricating
Most of these cleaning and lubrication instructions will be similar for all vintage reel. See the Basic Cleaning and Lubricating Procedures for details.
-
Clean the gears and inside of housing.
-
Lubricate the gears with grease.
-
Lubricate all other parts with oil.
Note! The cleaners, grease, and oil you use should be specifically for fishing reels. The Basic Procedures page lists some commonly used cleaners and lubricants that are safe to use on vintage reels.
Specific notes for this reel
This reel features several lubrication points designed to allow you to grease and oil the reel without disassembly - these are useful after you have reassembled the reel, for regular maintenance, but while the reel is disassembled is a good time to see where lubricants applied to these points will end up inside the reel.
The grease disc allows you to grease the gears and pinions without disassembling the reel. Simply push the disc with your fingertip to rotate it so the small hole in the disc aligns with the hole in the cap. Position the tip of the grease tube at the opening and apply a small amount of grease. Less is better! Applying too much grease invites sand and grit to be trapped and damage the gears.
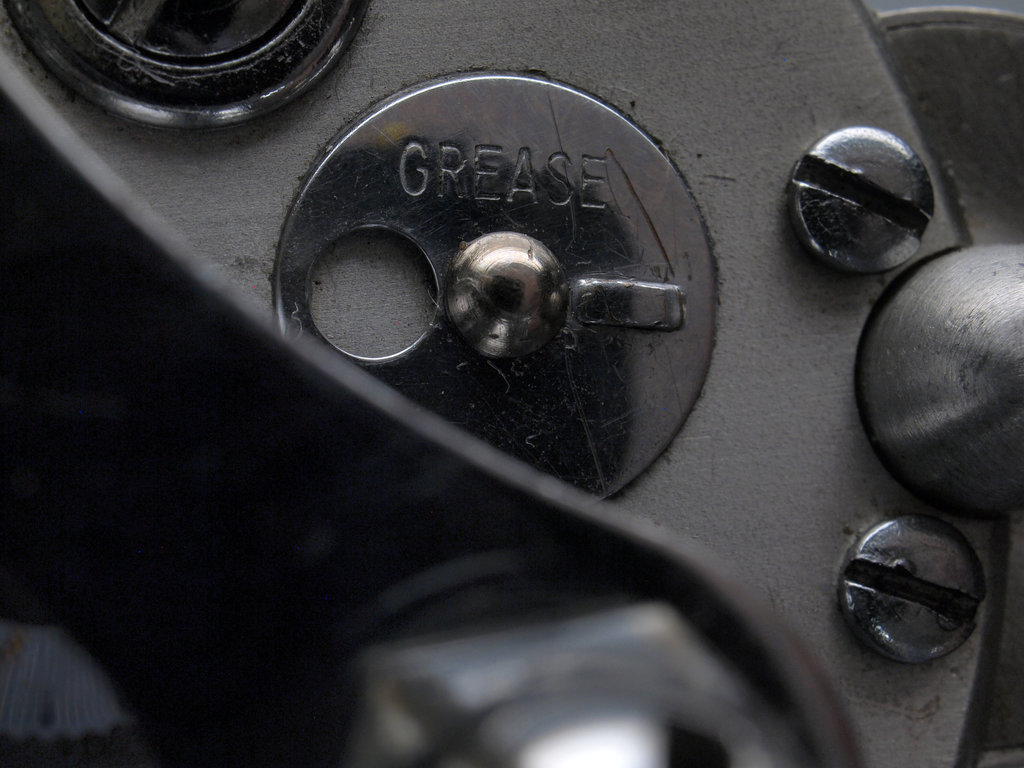
There is a small hole in the crank nut (in the center of the crank) which allows you to oil the crank without disassembling the gears. Simply poisition the tip of the oil applicator at the opening and apply a drop or two of oil. Again, less is best.
You are now ready to re-assemble the gears and housing.
Reassembly
Goal: replace all parts and bench-test the reel's functioning to verify that it has been reassembled correctly and that there are no up-until-now undiagnosed issues.
To re-assemble the reel you basically reverse the disassembly steps. There are a couple of additional notes that will make re-assembly go more smoothly.
Replacing the shaft: make sure that (1) the guide block is seated in the shaft cover, (2) the line guide is seated in the pillar slot, and (3) the shaft slides all the way through the line guide block assembly and is firmly seated.
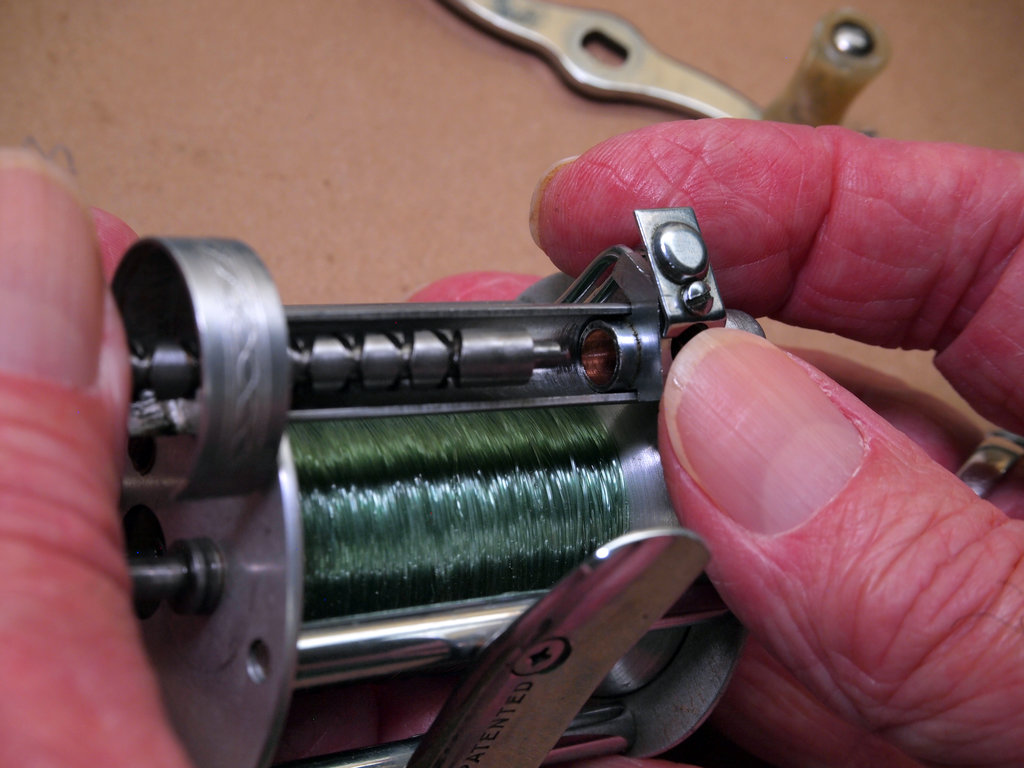
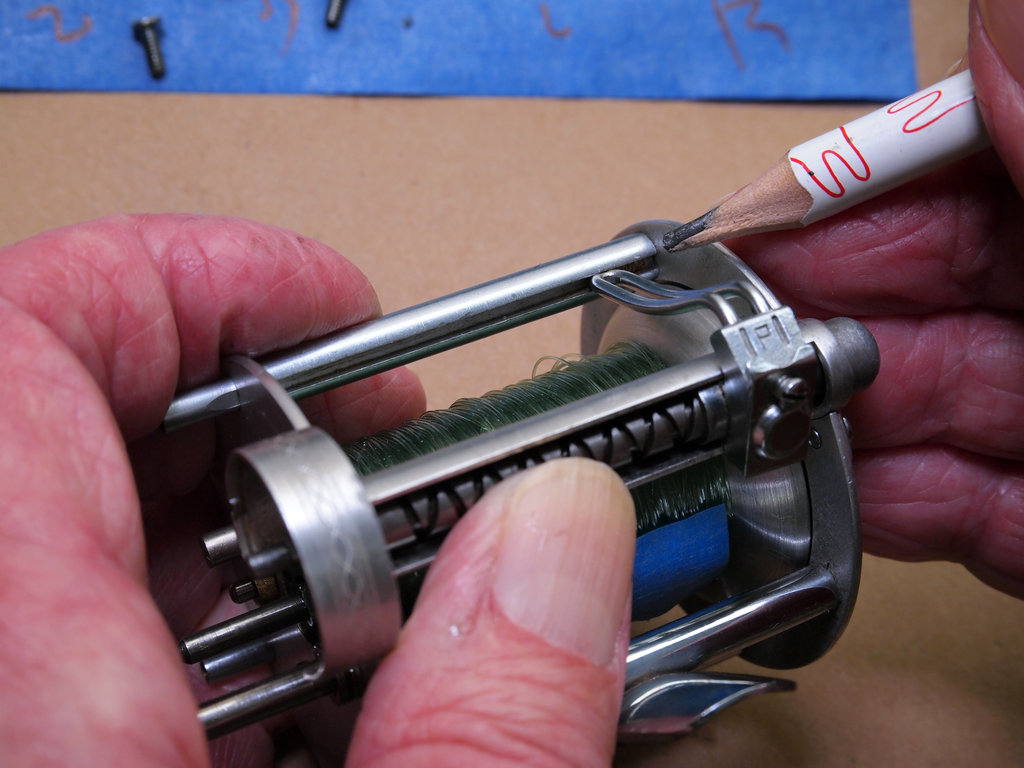
Replacing the spool pinion: make sure the slots on the sides of the pinion seat correctly on the end of the spool.
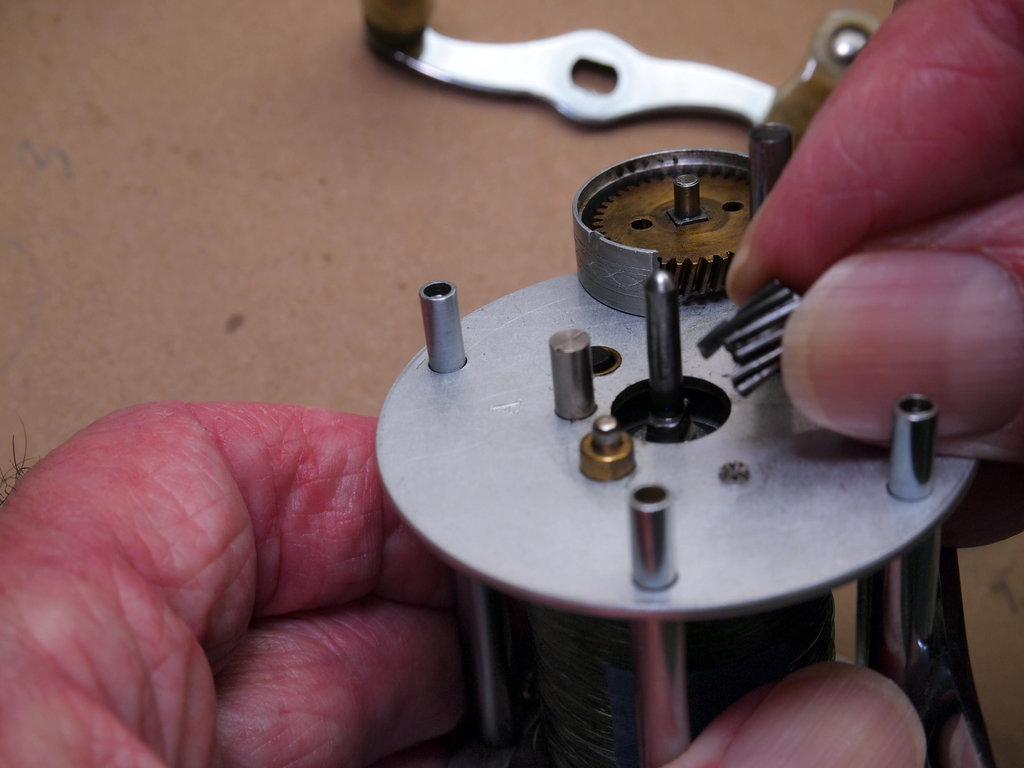
Replacing shaft pinion, spool pinion, and gear: make sure they are all firmly seated and the teeth all mesh.
Replacing the pawl: make sure that the pawl seats correctly into the guide block, where it contacts the shaft - the teeth on the pawl must mesh correctly with the grooves in the shaft for the level wind to work correctly.
Insert the pawl into the block, then without closing the cover turn the crank - after a few turns, the pawl should seat itself and the guide block should start traveling back and forth across the shaft. Then close the guide block cover, tighten the screw, and test again.
The finished reel should be ready for bench testing.
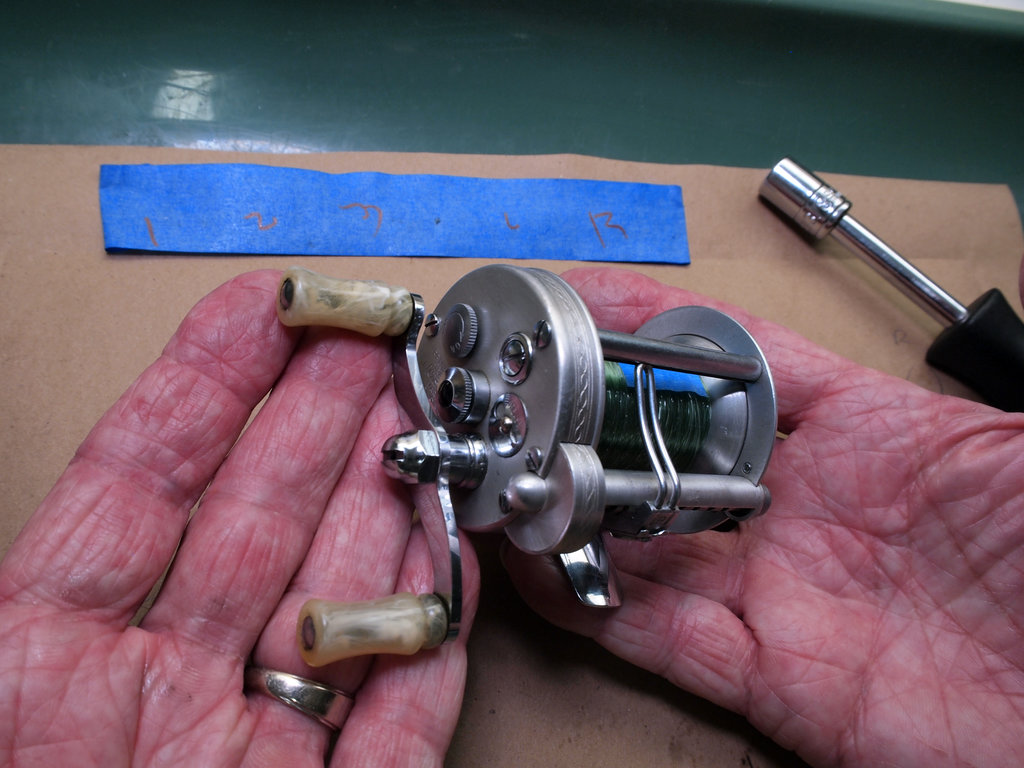
Bench testing
You can now perform several general functional tests before taking the reel into the field. As a basic general rule, if you turn the crank and there is any resistance or if there are any odd noises, stop and recheck your work because forcing the crank further may damage the reel. Go back through the service procedures as necessary to troubleshoot. Most issues can be traced back to some gear, pinion, pawl, or shaft not being aligned properly with its companion parts.
Besides smooth, mostly silent action when turning the crank, the following functions should be checked:
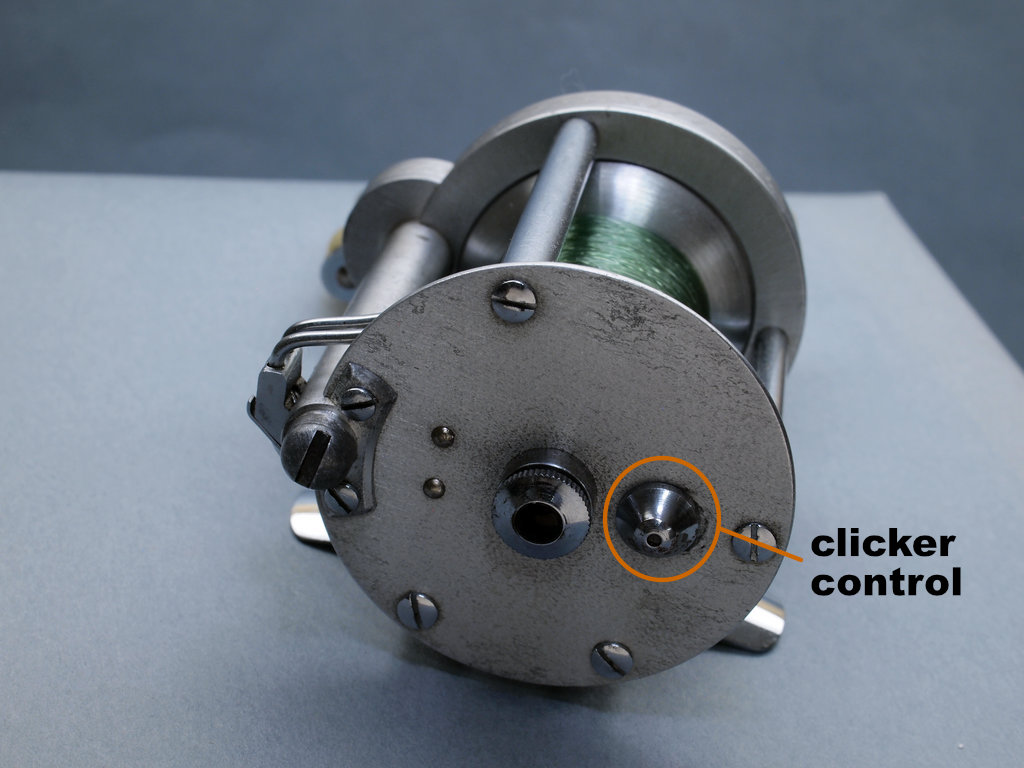
Clicker: With the clicker disengaged / off, make sure the crank turns smoothly in both directions.
With the clicker engaged / on, make sure you can hear the clicker when the crank is turned. This should also prevent the spool from turning easily.
ABL: Rotate the ABL button clockwise until it clicks - this should be about 2 1/2 complete turns. Right after the ABL button clicks is the zero tension setting. Rotate the crank / handles - with the tension at zero you should feel no resistance.
Then rotate the ABL one turn and turn the crank again - you should feel some resistance. Turning the ABL further should put more tension on the spool until the ABL button clicks and resets to zero. The ABL, along with most of the other controls, is on the crank side.
Level wind: Turn the crank / handles. Make sure the guide block travels smoothly back and forth across the shaft. This means that the level wind mechanism is working correctly and will wind line evenly onto the spool on retrieve.
If the pawl was not seated correctly on reassembly, or if any grit found its way into the grooves on the shaft, the guide block will not travel smoothly across the shaft. In this case loosen the guide block cover screw as in Disassembly I, remove the pawl, and re-seat it. It may take a few tries and some finesse to get it seated correctly. Then re-tighten the guide block screw and re-test.
If all this works, you can call it ready to fish.
References
- The Enterprise Manufacturing Co. Pflueger Free Spool Nobby
For full source details, see References.